Getting the character into position

There’s two ways to position the characters in the scene now.  This should make it easy to set up the scene faster without a lot of mouse-dragging, or just to zoom in on the head when you are working on an expression or new face setup.  Here’s the two ways you can move characters around:


  1. Use the Quick Move buttons.  Clicking one of these will pull the character into a predefined position.  You can also use these buttons if you lose the character off the side of the scene!
     
  2. Move with the mouse.  When you click on the scene and drag (hold the mouse button down and move the mouse) you will move the character in the scene.  By default this is a back-forth-left-right movement but if you click a different Mouse Mode icon at the top, you can change the movement to rotating the character or raising/lowering the character. 
You’ll probably find the Quick Move positions good for setting up the character positions quickly, then use the mouse move options to fine tune their place and rotation.

>> Go to Pikkipi now

Make more faces with new head shapes

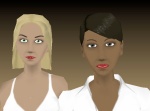
To add further variety to the types of faces you can create I have added a wide and narrow version of the male and female heads.  In combination with the options for eyebrows, mouth etc. it should now be possible to make some quite unique and characterful faces.  Next I’ll work on some more texture additions for faces – crease lines, that sort of thing.

Here’s a couple of shots using the new face shapes.

Create a scene

I’ve been working on this 3d character poser / scene creator for a while and it’s pretty much ready for public consumption.  I’ll keep adding features and options.  You can go play with it any time at www.pikkipi.com

Scene made with Pikkipi